About Me

- 6060
- I am a mom of two. I love amigurumi and colorful yarns. I will try to help you as much as I can if you have questions about plastic safety eyes and noses. Have fun knitting and crocheting!! The HEART behind the Eyes - Clara
Powered by Blogger.
Blog Archive
-
►
2015
(2)
- ► March 2015 (1)
- ► February 2015 (1)
-
►
2014
(1)
- ► November 2014 (1)
-
►
2011
(18)
- ► December 2011 (1)
- ► October 2011 (1)
- ► August 2011 (2)
-
►
2009
(46)
- ► December 2009 (1)
- ► October 2009 (2)
- ► April 2009 (7)
- ► March 2009 (6)
- ► February 2009 (6)
- ► January 2009 (21)
-
▼
2008
(49)
- ► December 2008 (5)
- ► November 2008 (3)
- ► October 2008 (7)
- ► September 2008 (4)
- ► August 2008 (1)
- ► March 2008 (5)
- ► February 2008 (1)
- ► January 2008 (5)
-
►
2007
(8)
- ► December 2007 (1)
- ► November 2007 (4)
- ► October 2007 (3)
Sunday, April 27, 2008
Installation of Safety Eyes Instruction
Installation of Safety Eyes Instruction
By Clara (6060.etsy.com & 6060eyes.artfire.com)
3/28/2009 updated
Usage of this document:
 Remember to MAKE SURE the eye is in the right place. Push the washer fluted side up towards to the back of the eye.
This is the finished look of a 6mm black eye installed as a cat nose!
With all the parts together, my cat finally can see and smell.
I hope this document helps you to understand how to put the eyes on your critters and creations. Thank you and enjoy!
By Clara (6060.etsy.com & 6060eyes.artfire.com)
Usage of this document:
Do not distribute this document or sell this document by any means. The intention of this document is to show crafters how to install the safety eyes. Thank you.
Suggestion:
1. Make sure the eyes are located in the right place; once the washers are in, it is very hard to pull them back out again.
2. If you are using material like fabric, vinyl and leather, enlarge the hole a little by poking a needle (yarn needle/ skewer/ large sewing needle/ knitting needles, etc) through the material first.
2. Once you think they are in the right place, you can start the process of placing washers at the back.
3. This is the back side of the safety eyes.
4. Holding the washer fluted side up, slide it on to the eye post.
(Again, MAKE SURE the eye is in the right place. Once you push the washer to the back of the eye, it will be extremely hard to remove).
5. Apply even pressure with both thumbs to slide the washer down the eye post.
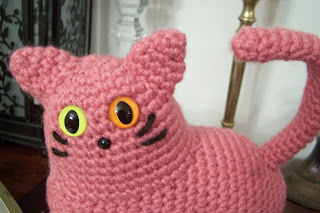
This is the finished look of two 15mm cat eyes placed on my crocheted animal.
If you use the little black safety eyes, installation will be the same as the 15 mm eyes.  Remember to MAKE SURE the eye is in the right place. Push the washer fluted side up towards to the back of the eye.
 This is the finished look of a 6mm black eye installed as a cat nose!
With all the parts together, my cat finally can see and smell.
Clara :)
******************************
If you need more help because you have arthritis, please click the link above.
I have couple more suggestions for you.
******************************
Updated: Plastic eyes/noses washers
Bear Joints:
Other critters I have made:
Saturday, April 19, 2008
Rosie is here!!!
I have been looking for a Mademoiselle Rosebud (MRB) for a long time! However, every single one I saw either was too expensive or they have already been customized. I don't really like all these customization for MRB, I wanted one that's natural and original, even though a 2nd hand doll I would not mind at all. I searched for TIB, Blythe for adoption in flickr group, I just couldn't find one that's what I wanted.
Finally a few days ago I saw a photo of MRB in flickr group the owner said she wanted to send her to a good home. I at once sent a message to the owner and asked. Oh My God, pricing was within my range, blythe was fully stock, clothes wasn't fully stock but at that point, my gut told me " go for it, that's the one you wanted all this time " . I made a payment instantly and hoped for the best!
This seller I bought MRB from was pipercat99, she was such a nice person, we chatted back and forth since I adopted her MRB. She is the nicest, kindest person I ever met online these days. We chatted so much it's just naturally becomes friends. I love that!!!!
Since I have Blythe, I have doubted myself whether I could bond with these cutie gals, I have tried my best with MM and EP, however, with MRB, everything is just so natural! Love grows within myself to her! It's just a weird feeling! :)
I am so happy that I got her, thanks pipercat99!!!


Subscribe to:
Comments (Atom)


